Transitioning to solar energy is a significant step towards sustainability and cost savings. If you're contemplating a residential solar installation, understanding how to prepare your home can streamline the process.
This guide will walk you through essential steps to ensure your home is ready for the shift to solar energy.
And as a quick note - while some of these preparations may seem tricky and time-consuming, going solar can be an extremely easy process if you partner with a reputable solar installer. Your installer should do all the heavy lifting when it comes to making preparations so you can sit back, relax, and count down the days to free electricity.
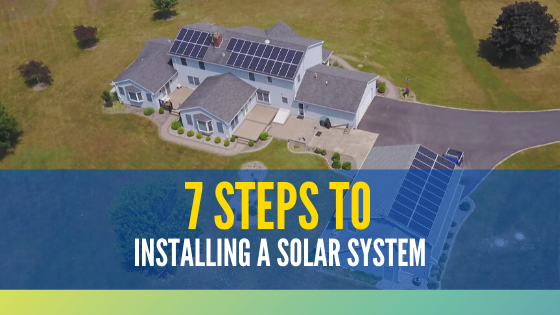
The 7 Steps for Preparing for a Residential Solar Installation
1. Determine Your Home's Solar Energy Needs
First and foremost, you’ll want to decide how much of your electricity bill you’d like to offset with solar energy.
In most places, there are regulations that limit your solar system to 100% of your energy usage, meaning you won’t be able to “oversize” your solar system and sell the energy elsewhere.
For most people, installing a system that produces as close to 100% of their electricity usage is the most economic solution. However, this is dependent on how much space you have available to install your system.
Additionally, this may not be in line with your financial goals if you want to keep costs down in the short term. While there are soft costs that don’t change much regardless of the system’s size, installing a smaller system will cost moderately less than a larger system since you won’t have to pay for as much equipment.
How do you know how many solar panels you need? Grab your electric bill, take a look at how many kilowatt-hours (kWh) you use in a month or year, and call a reputable solar installer for a quote. Once they’ve taken a look at your property and gathered some information, they’ll be able to get you a cost and production estimate.
2. Evaluate Your Property for Solar System Placement
To maximize the efficacy of your solar system, you’ll want a bright, sunny spot with exposure to the sun for most of the day. In the northern hemisphere, the best area to place the panels is south-facing roofs. However, if your south-facing roof is heavily shaded from nearby trees, you may want to have some of those trees removed or trimmed back.
If this isn’t for you, or you don’t have a south-facing roof, you may be able to place the panels on your west- or east-facing roof. Even though they’ll be slightly less exposed to sunlight, adding just a few more panels can compensate for any lost production for just a modest additional cost.
If your roof isn’t a good place for panels, considering installing a ground-mount solar system. You’ll want to scope out your property and think about a good spot. Like a roof-mounted system, exposure to sunlight is key.
However, if you’d like to keep the installation price down and the efficiency up, you may want to keep the system close to your utility interconnection. The further away it is the more labor and materials it will cost to connect the system. In addition, energy will be lost the further it has to travel to the interconnection. Think of how a garden hose loses force as the distance from the spigot increases.
Reaching out to solar installers will help you with this process. Solar installers can look at your property (in-person or virtually), to see how things are laid out, and evaluate the shade on your property. They’ll then use this information to select the best location and design for your system, so they can deliver an accurate price and production estimate.
3. Decide on Solar Batteries for Energy Independence
Solar batteries can add an extra level of dependability and security to your solar investment. If you decide to make the investment, you’ll be able to access a limited amount of electricity even when the grid goes down.
Because grid-tied solar systems are required to shut down when the power goes out, your solar system won’t be supplying your home with electricity. However, by installing a battery backup, you’ll be able to draw on the power stored in your battery until the grid comes back on.
That said, batteries can add a substantial cost to your solar investment, so you’ll want to weigh the pros and cons of installing solar batteries before you make the call.
4. Understand Local Solar Installation Regulations
Just like installing a pool or shed, you’ll need some regulatory approvals before going ahead with the physical work of the project. But in addition to your local building department, you’ll also need to gain approval from your utility.
The permitting process and pre-installation paperwork can be quite daunting and time-consuming. They’ll require specifications for your equipment, the system’s electrical design, and a building plan. Your solar installer should take the lead during this process, but it’s good to be acquainted with what kind of paperwork they’ll be submitting on your behalf.
Additionally, you’ll want to look into or inquire about your utility’s form of compensation for excess electricity your system produces. In most states, utilities compensate solar-producers for excess electricity uploaded back to the grid through a process called net metering.
With net metering, any excess electricity generated by your solar system will be uploaded to the utility grid, and they’ll distribute that electricity to others who need it. You’ll be compensated for that electricity with a kWh per kWh credit. That way, when your solar system isn’t producing, like at night, you can draw electricity from the grid using that credit.
However, not all utilities do net metering. Some states, like New York, have their own method of compensation which may or may not be even more beneficial to solar producers. Other states will credit you for the wholesale rate, but you’ll be drawing electricity at the higher retail rate. That means you’ll have to pay the difference.
5. Explore Solar Incentives and Financial Benefits
Solar incentives help keep the cost of your solar installation down, and depending on what you qualify for, they can make a huge difference.
The most widely available incentive is the 26% solar investment tax credit. This allows you to eliminate 26% of the cost of your solar system from your owed taxes. It’s available to anyone so long as they own their solar system and pay taxes.
In addition, there may be incentives available to you on a state, utility, or local level. You’ll want to look into what incentives you can take advantage of and be prepared to do the paperwork to get those incentives.
Your solar installer should be able to guide you through this step, sharing all that is available to you and ensuring that you have the right information to meet the requirements. However, solar installers are not accountants. We always recommend running your solar proposal by your accountant before signing it. This is an important step to ensure you can utilize all the tax benefits.
6. Assess Your Roof's Suitability for Solar Panels
As a rule of thumb, solar panels weigh around 2.5 to 2.7 pounds per square feet. If you’re installing a roof-mounted solar system, you’ll want to be sure that your roof can support the additional weight of the solar panels.
Many roofs can handle the weight with no need for additional support. However, you’ll want to get a third-party structural engineer or a building inspector to evaluate your roof to make sure it can safely hold your new solar system.
If you’ve already chosen a solar installer, they should be able to set up the inspection on your behalf. The inspection is a requirement of many local building code enforcement offices.
If your roof is old and needs to be replaced, or if there are only a few more years left on its useful life, you may need to have a new roof installed before your solar panels. While no one looks forward to paying for a new roof, it’s money you’ll need to spend within the next few years anyway, and adding a solar system on top of your roof can actually extend its life. The durable panels will act as a shield for your roof, protecting it from the weather.
7. Prepare Your Property for Solar System Installation
A solar installation should be a fairly simple and non-invasive process, meaning there won’t be a whole lot for you to do once boots are on the ground (or roof!). That said, making sure the area they’ll be working in is clear and easily accessible is a great way to be sure the installers can come in and get right to work.
Be sure to clear away anything that may be in the way of your electric panel and utility meter, in addition to the area where they’ll be installing the inverter and battery system.
Most residential solar systems can be installed in 2-5 days depending on the size and complexity.

Preparing for Your Solar Installation
The first step in preparing for your solar installation is deciding how large of a system you’d like, where that system can go, and whether or not you’d like to install batteries with it.
From there, you’ll want to understand both the local regulations and the incentives that are available to you, as well as ensuring that your roof can handle the added weight of the panels.
Once all this is settled and you’ve contracted a solar installer to install the system, simply make sure the area they need to work is clear and easily accessible.
Preparing for your solar installation can be a frustrating, time-consuming process. It can also be incredibly simple and easy. All this depends on the solar installer you work with.
Make things easier and partner with a reputable, full-service solar installer who will take care of all the paperwork and act as an advisor to you. They should be focused on helping you make the best decisions for you and your goals - not their bottom line.